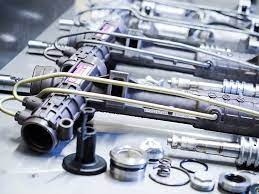
If your car is experiencing steering problems like difficulty in turning or loss of power assist, then it’s time to consider replacing your power steering rack. While the thought of taking on such a task might feel daunting, it can easily be accomplished with the right tools and a bit of elbow grease.
In this DIY power steering rack replacement guide, we’ll show you step-by-step how to replace your power steering rack to get your steering system operating smoothly again.
Is DIY Power Steering Rack Replacement Possible and Safe?
Replacing a power steering rack may seem like a daunting task for those who are unfamiliar with the mechanics of a car. However, with the right tools, knowledge, and precautions, it is possible to carry out a DIY power steering rack replacement safely. Before starting the process, it is essential to research your specific car’s make and model to ensure you have the correct replacement part.
Additionally, ensure that you have the necessary tools and equipment, including a jack and jack stands, a torque wrench, and a power steering fluid pump. While it may take some time and effort, replacing your power steering rack yourself can save you money and provide a sense of satisfaction for successfully completing the job.
A Step-by-Step Guide for DIY Power Steering Rack Replacement
Step 1: Remove the old steering rack.
The first step in replacing your power steering rack is to disconnect the battery, raise the vehicle, and place it on jack stands. Then, you need to drain the power steering fluid, remove the tie rod ends, and detach the steering shaft from the steering rack. Finally, remove the bolts holding the rack in place and pull the old rack out.
Step 2: Install the new steering rack.
To install the new steering rack, secure the new rack in place using the same bolts as the old one. Reconnect the steering shaft and tie rod ends but make sure they’re properly aligned to avoid any alignment issues.
Step 3: Bleed the power steering system.
Once you’ve installed the new rack, it’s essential that you bleed the power steering system. This involves refilling the system with power steering fluid and turning the steering wheel back and forth to get any air bubbles out. Make sure the car is on level ground and you have enough fluid. This is a crucial step in ensuring proper operation of the power steering system.
Step 4: Test the new steering rack.
Before you start driving again, it’s crucial to test the new steering rack to ensure proper operation. Turn the steering wheel back and forth several times to make sure there are no leaks or other issues. Take the car for a test drive and check if there are any noises or vibrations. It’s also essential to check your alignment after replacing the steering rack.
Step 5: Reconnect the battery.
Finally, reconnect the battery, and you’re good to go. The car should steer normally and smoothly, and you should be able to drive safely without any major issues.
Conclusion
Replacing a power steering rack can be a daunting task, but it doesn’t have to be. With this step-by-step guide from steering rack – A-Premium.com, you can easily replace your power steering rack without having to worry about any issues or problems. Remember to take your time and be patient throughout the process, and most importantly, stay safe while working on your vehicle. Happy driving!